







Your Sound Doesn’t Have to Suck: A Friend’s Guide to Renting and Buying Pro Mics & Interfaces for YouTube
You know that moment when you watch your own video back and the audio makes you cringe? Maybe it’s hollow, hissy, or your voice sounds like you’re broadcasting from inside a tin can. The good news is that fixing this doesn’t require a recording studio or a second mortgage. After years of geeking out over gear and helping friends launch channels, I can tell you the sweet spot is understanding just two things: the microphone that captures your voice, and the audio interface that gets it into your computer. And you don’t even have to buy them outright—you can dip your toes in by renting first.
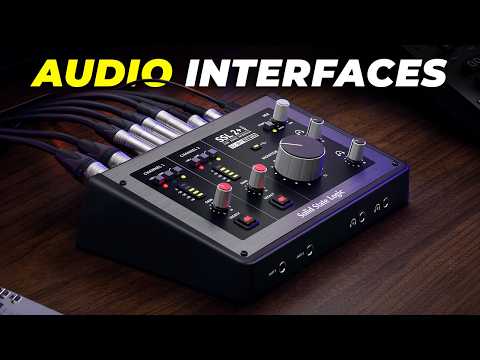
Let’s tackle the big question I hear all the time: microphone vs audio interface which first? If you’re staring at a budget, you might think you can only pick one. But they aren’t competitors; they’re dance partners. A traditional XLR microphone (the kind with three pins) needs an audio interface to convert its analog signal into digital USB for your computer. Without the interface, the mic is just a pretty paperweight. So if your heart is set on that classic broadcast sound, you’ll need both. The only way to skip the interface is to buy a USB microphone, which has the interface built in, but that limits your future flexibility. So the real question isn’t which one, but “which road do I go down first?”—and that answer almost always starts with a decent interface and a solid, affordable XLR mic.
But let’s say you’re not ready to commit. Maybe you’re testing a format, or you need a serious upgrade for a single interview series. That’s where the option to rent professional microphone kits shines. Lots of local music shops and online services let you rent recording equipment for youtube projects by the weekend or week. I’ve done this when I wanted to try a high-end shotgun mic for outdoor vlogging, and it cost me less than a fancy dinner. Renting gives you real-world experience without the pressure—you find out if that $500 mic actually sounds $400 better than the one you’ll eventually buy. You can even rent an audio interface alongside it to feel the whole signal chain.
Once you’re ready to own your gear, your budget doesn’t have to make you weep. The best microphone for youtube videos doesn’t have to be the most expensive; it’s the one that flatters your voice in your specific room. For most folks, a large-diaphragm condenser mic is a sweet start—it’s sensitive, detailed, and picks up that rich podcast tone. You’ll find a pro microphone under 200 that punches way above its price class. The Audio-Technica AT2020 and the Rode NT1-A are perennial favorites under that mark, and they’ve launched thousands of channels. But if your room has too much echo (think bare walls and hardwood floors), a dynamic mic like the Shure SM58 or the sE Electronics V7 might be smarter—they reject more background noise and you can still snag them easily as a pro microphone under 200.
And then there’s the audio interface side. When you buy audio interface budget models, you’re not sacrificing quality for price anymore. The Focusrite Scarlett Solo has been the go-to cheap audio interface for youtube creators for a reason: it’s dead simple, has clean preamps, and often comes with a free software bundle. The Behringer U-Phoria UM2 is even cheaper and surprisingly reliable for a single-person setup. These boxes aren’t just for YouTube—they make an excellent audio interface for podcasting too, because they give you that direct monitoring feature (so you can hear yourself in headphones with zero delay) and a sturdy gain knob to dial in your levels. If you ever add a co-host, stepping up to a two-input interface like the Scarlett 2i2 keeps your options open.
Now, how to set up microphone and interface without pulling your hair out. It’s honestly easier than setting up a new smartphone. Take your XLR cable (it’s got three holes on one end and three pins on the other), plug the female end into the mic and the male end into the interface input. If you’re using a condenser mic, press the “48V” phantom power button on the interface—dynamic mics don’t need it. Then connect the interface to your computer via USB. Open your recording software (OBS, Audacity, or any DAW), select the interface as your audio input, and adjust the gain knob so your loudest voice peaks around -12 dB to -6 dB. That’s it. If you don’t hear anything, check that the phantom power is on, the cable is seated, and your track isn’t muted. Nine times out of ten, it’s one of those three gremlins.
So, should you rent or buy? Here’s my no-nonsense take. If you’re completely new, renting a professional microphone and an audio interface for a weekend can teach you more than ten hours of YouTube reviews. You’ll hear what your voice actually sounds like in your space, learn what features you actually touch, and avoid buying something that just collects dust. Then, when you’re ready to commit, pick up a cheap audio interface for youtube (around $100–$120) and a pro microphone under 200. Total investment: roughly $300, and you’ll have a setup that can carry you through years of videos and even an audio interface for podcasting if you branch out. The cool part? You can always rent recording equipment for youtube if you need a specialty mic—like a lavalier for an on-the-move shoot or a stereo mic for a music performance—while your core desk setup stays solid.
One last piece of advice: Don’t get paralyzed by the search for the best microphone for youtube videos. The algorithm won’t care if you used a Neumann U87 or a $60 dynamic mic; your audience will care that they can understand you clearly and that you don’t sound like you’re in a bathroom. Nail that, and your content can finally shine the way it deserves. Now go make some noise—the good kind.