







The Weekend Warrior’s Guide to Making Your Car Shine Like a Diamond, Right in Your Own Driveway
Look, I get it. Life’s busy, and the idea of spending a whole Saturday scrubbing your car can feel like a chore. But here’s the secret: turning your home car wash into a full-on detailing session is weirdly satisfying, and once you nail the process, you’ll never look at a drive-through car wash the same way again. Plus, you’ll save a pile of cash compared to mobile car detailing services, and you’ll know every inch of your ride is treated right.
You know that feeling when you run your hand over a freshly waxed hood and it’s slicker than a greased-up penguin? That’s the goal. But getting there isn’t just about slapping on some paste and hoping for the best. I’ve messed up plenty of times—streaky windows, wax on black trim that turns white, water spots that refuse to budge—so I’m here to walk you through the whole do it yourself car detailing dance without the headaches.
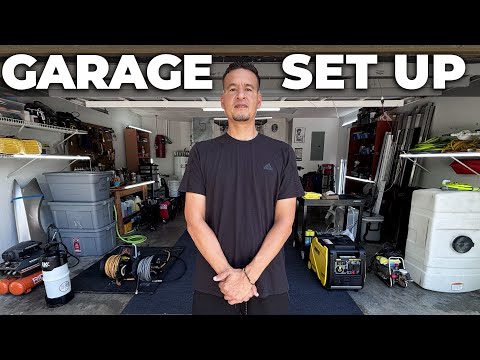
First, let’s talk setup. You don’t need a garage full of gear, but having the right car detailing supplies makes the difference between a quick wash and a jaw-dropping finish. My bare-minimum kit: two buckets with grit guards, a pH-neutral car shampoo, a microfiber wash mitt, a stack of plush microfiber towels, a clay bar kit, a good polish if you’ve got swirls, and your choice of the best car wax for home use. Oh, and a shady spot. Direct sunlight is the enemy—it dries soap onto the paint before you can rinse, leaving spots that’ll drive you nuts.
Start with a thorough rinse. Use a regular garden hose with a nozzle or, if you’re fancy, a pressure washer on a gentle setting. Blast off the loose dirt first. Then fill one bucket with soapy water and the other with clean water for rinsing your mitt. This two-bucket method is the hill I’ll die on; it keeps grit from grinding into your paint like sandpaper. Wash from the top down—roof, glass, hood, then lower panels—because the bottom areas are the grimiest. Every time you finish a section, dunk the mitt in the rinse bucket, scrub it against the grit guard, then back into the soap. This simple home car wash step prevents those fine spiderweb scratches that show up in sunlight.
Once the whole body is clean, don’t let it air-dry. That’s how water spots form. Use a large microfiber drying towel and gently blot or drag it across the surface. I like to spray a quick detailer as I dry—adds a bit of slickness and catches any leftover dirt. Now, here’s where many folks stop, but if you really want to know how to detail car at home properly, you keep going.
Next up: decontamination. Run the back of your hand over the paint after washing. Feels a little rough, like tiny bumps? That’s bonded crud—brake dust, industrial fallout, tree sap. A clay bar is your best friend here. Fold it into a flat patty, spray a clay lubricant on a small area, and glide the bar back and forth with zero pressure. You’ll hear the surface go quiet as it smooths out. Wipe with a microfiber cloth and move on. It’s oddly meditative, like giving your car a facial. This step is crucial before any wax because you want that protection to bond directly to clean paint, not to embedded gunk.
Now, inspect your paint. If it’s swirled or hazy, you might consider a light polish. I won’t dive deep into machine polishing here because that’s a whole other rabbit hole, but even a gentle all-in-one polish by hand can bring back gloss. Apply with a foam applicator, work it in small circles, and buff off before it dries. The difference is often night and day, especially on darker colors.
Now the fun part: learning how to wax a car without making a mess. I’ve tried pastes, liquids, and sprays, and for a home warrior, a high-quality paste or liquid wax gives that deep, glassy warmth that spray waxes just can’t match. So what’s the best car wax for home? I lean toward synthetic sealants blended with carnauba—they last months, not weeks, and they’re easier to apply. My current obsession is a creamy polymer sealant that spreads like butter and buffs off with zero dust.
When you’re ready, apply wax with a foam applicator pad. Work on one panel at a time. Dab a small amount onto the pad—a little goes a long way—and spread it in thin, overlapping circles or straight lines. Thin is key; a thick layer just wastes product and makes removal a workout. Let it haze according to the instructions. Some waxes dry in a minute, others need five or ten. Do the swipe test: drag a clean finger through the haze. If it smears, wait. If it comes off clean, it’s ready to buff. Use a plush microfiber towel, fold it into quarters, and flip often. Buff off the residue until the paint reflects like a mirror.
A few car waxing tips I’ve learned the hard way: avoid plastic trim and rubber seals like the plague. If you do get wax on them, a pencil eraser or a bit of peanut butter (seriously, the oils break down wax) can clean it up. Work in the shade, and if you’re doing the whole car, start with the roof so you’re not leaning over freshly waxed doors. Don’t forget the wheels—after they’re clean and dry, a coat of sealant or wax repels brake dust and makes future cleaning a breeze.
While the wax cures, shift to the interior. Doing car interior cleaning at home doesn’t have to be a backbreaker. Gather your vacuum with a crevice tool, a soft brush, a microfibre cloth dampened with water for dust, and a dedicated interior cleaner for tougher spots. Start by pulling out floor mats and giving them a good shake. Vacuum everything—seats, carpets, the cracks between the console and seat where French fries go to die. Use a soft-bristled brush to agitate dust from air vents and dashboard nooks, then wipe it all down with a damp cloth. If your leather or vinyl looks dull, a gentle conditioner brings it back without that greasy nightmare. I avoid Armor All like the plague; it can off-gas a fog on your windshield. Just a mild, water-based dressing does the trick. Wipe inside windows last with an ammonia-free glass cleaner and a clean, dry microfiber. You’ll be amazed how much brighter the cabin feels.
Now, a lot of people ask me about mobile car detailing services. Are they worth it? Sometimes, absolutely. If you’re pressed for time or need paint correction, a pro is gold. But I find that doing it myself connects me to the car, you know? I catch little paint chips before they rust, notice when a tire’s looking low, and honestly, it’s a bit of therapy. With my music on and a cold drink nearby, it’s me-time disguised as productivity.
If you’re feeling overwhelmed with the whole car detailing step by step marathon, just break it into chunks. You could wash one weekend, clay and wax the next. Keep the rhythm friendly. The more often you do it, the faster you’ll get. And when you walk out the next morning and see the way the sun curves over the hood without a swirl in sight, you’ll understand why people get hooked on the home detailer life.
So grab a bucket and some towels. Your car’s been patient, and it deserves a little love. Once you master these basics, you’ll be the friend everyone hits up for advice, grinning as you rattle off your favorite car detailing supplies and the exact moment you knew you’d never pay for a basic wash again. Happy detailing!