








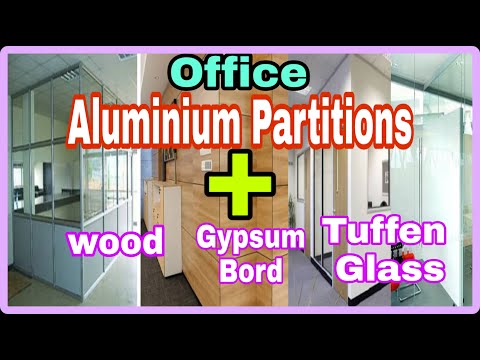


Taming the Empty Space: Your Friendly Guide to Ceilings and Partition Walls
So you’ve got a big open basement, a loft that needs some separation, or maybe a room that’s just begging for a lower, cozier ceiling. You’re staring up at exposed joists or standing in a cavernous void, and you’re thinking, “I can totally build that.” And honestly, you probably can. Let’s walk through the whole process of ceiling and partition installation like we’re two buddies in the garage, coffee in hand, figuring it out together.
I remember the first partition wall I ever built. It was supposed to be a simple room divider for a home office, just a wall to stop sound and give some privacy. I thought I could just frame it up, slap on some drywall, and call it a day. But the truth is, the bones are everything. When you’re framing a partition wall, you’re not just nailing wood together—you’re creating the skeleton that’ll keep things straight, quiet, and crack-free for years. So let’s start there, with the basics of ceiling and wall framing.
Before you lift a single stud, take a good look at your ceiling joist layout. Up there, those timbers or engineered trusses are your anchor points. If you’re building a non-load-bearing partition, you’ll still need a solid top plate attached securely to the ceiling framing. Layout lines on the floor and then plumb up to mark the ceiling, snapping a chalk line for accuracy. The ceiling joists might not always align perfectly with where you want your wall, so you may need to add blocking between them to screw that top plate into. This is one of those ceiling framing techniques that folks overlook until the wall wobbles. A good trick: run a few screws into the blocking at an angle from the joist side for a rock-solid grab.
Now, when it comes to framing a partition wall, standard practice is 2x4 studs spaced 16 inches on center, but you can go 24 inches if it’s just a divider and you’re not hanging heavy cabinets. For a room divider you want to disappear into the background, a 2x4 wall with a single top and bottom plate works beautifully. But if you’re integrating a door, double up the top plate and add a header. Here’s the fun part: you can build the whole wall on the floor, then tilt it up. It’s a classic how to build a room divider move—get everything square, nail sheathing or just the drywall later, and with a friend’s help, walk it upright. Make sure the bottom plate is pressure-treated if it’s on concrete, and stick it down with construction adhesive and powder-actuated fasteners.
Once the wall is standing and plumbed, you’ll start thinking about drywall, and that naturally brings up sound. A hollow stud wall is basically a drum. To keep conversations private, look into soundproof partition wall methods. The simplest upgrade is using 5/8-inch thick drywall and stuffing the cavity with mineral wool insulation. Even better, decouple the drywall from the studs with resilient channels or a double stud wall with an air gap. If you’re building a home theater divider, you can go further with mass-loaded vinyl and acoustic sealant around the edges. These details don’t add much thickness but make a massive difference in the thump and murmur that travels between rooms.
Ceilings, though—they’re a different beast entirely. You might find yourself choosing between a drywall ceiling vs drop ceiling, and the decision usually hinges on access and vibe. A drywall ceiling looks clean and residential, perfect for a living space. With a drop ceiling (or suspended ceiling), you’ll have removable panels that let you get at pipes, wires, and ductwork above. In a basement, that access can be a lifesaver. So, suspended ceiling installation tips? First, determine your ceiling height. Map out a grid that’s square to the room, not just the walls, because walls are rarely perfectly straight. Use a laser level to mark the wall angle around the entire perimeter, then hang your main tees and cross tees. The trick is to keep the grid flush and level; if one corner sags, a whole row of tiles will show the mistake. Also, plan your cuts so that perimeter tiles are at least half the width of a full tile—nobody likes a skinny sliver border.
If you’re going for the smooth, painted finish, how to install ceiling drywall becomes the big question. Drywalling ceilings is a workout for your arms and neck, but a rented drywall lift makes life a thousand times easier. You’ll want to use long sheets (12-foot or 16-foot) to minimize butt joints, and always run them perpendicular to the ceiling joists. That’s a key bit of ceiling joist layout wisdom: the joists are the framing members you’ll screw into. For 5/8-inch ceiling drywall (the sag-resistant choice), screw spacing should be about 12 inches in the field and 8 inches along the edges. You’ll need a helper or a deadman T-brace to hold one end while you get the first few screws in, unless you rent that lift. And please, stagger your end joints like brickwork to avoid long, straight cracks later.
Combining these skills, you can transform a space completely. Imagine you’re finishing an open-plan basement. You’ll need to frame a few partition walls to carve out a bedroom and a bathroom, then put up a ceiling across the whole thing—maybe a mix of drywall in the living zone and a suspended ceiling where all the plumbing and HVAC lives. For the walls, you’re following your partition wall installation guide: layout, bottom track secured to slab, top track aligned and anchored, cut your studs a smidge short so they slide in without forcing the floor or ceiling out of level. Use a level to check each stud before nailing. It’s tedious but therapeutic, in a way.
I can’t overstate how much easier this is if you nail the ceiling framing techniques first. For a drywall ceiling, make sure your ceiling joists are actually flat. Hope is not a strategy. Put a straight edge across them before you start and shim any low spots with cardboard drywall shims or thin plywood strips. If you’re attaching the ceiling drywall to an existing structure, you might need to add furring channels perpendicular to the joists to level things out and provide a nailing surface. This is especially common in old houses where the joists have settled into a gentle bowl shape.
One of the most satisfying projects is a room divider that feels like it was always there. I once helped a friend turn a single large bedroom into two smaller ones for his kids. We framed a partition wall right down the middle, installed a prehung door, and then tackled both sides with drywall. For soundproofing, we packed the cavities with fiberglass and used a second layer of drywall on one side with Green Glue between the layers. The result was two quiet, private rooms. That was all built on the principle of ceiling and wall framing basics—straight lines, solid anchoring, and careful measurements. The wall stopped at the existing ceiling, but we had to patch the ceiling drywall where the old wall was removed, blending the texture to make the join invisible.
Even if your project is purely aesthetic, like a decorative drop ceiling with fancy tiles, the same rules apply. The main runners need to hang from the structure above with wire at specific intervals—every 4 feet for a standard grid, but check the manufacturer’s specs because heavy tiles may require closer hangers. A lot of suspended ceiling installation tips boil down to “get your grid square and level, and the tiles will click right in.” If your room is irregular, you might end up with angled cuts; a sharp utility knife and a straightedge handle most tile cuts, but tin snips are your friend for the grid.
There’s something deeply satisfying about seeing floor plans turn into actual walls and ceilings. You’ll learn to read a tape measure in your sleep, and your hands will remember the weight of a hammer or a drywall screw gun. But more than that, you’ll gain the confidence to reshape your own world. Every time you sit in a room divided by a wall you built, under a ceiling you hung, you’ll feel that quiet pride. Just be careful—once you start framing, you might find it hard to stop. Next thing you know, you’ll be eyeing that open closet as the perfect reading nook, partitioned off with just a little wall and a pocket door. And that’s a project for another weekend.