











The Friendly Neighbor’s Guide to Community CCTV That Actually Works (And Doesn’t Annoy Everyone)
You don’t need to be a security expert to get a community camera system up and running, but you do need to avoid turning your block into a surveillance circus. Here’s the real talk on setting up cameras that your neighbors will thank you for, not tear down.
A couple years back, my friend Raj in a 20-unit apartment complex tried to go full vigilante after a package theft. He bought four cheap cameras, screwed them into the hallway ceilings without telling anyone, and aimed one directly at a neighbor’s door. Within a week, the management took them all down and fined him. That’s when I realized: community CCTV installation isn’t just about mounting hardware — it’s a social skill. So let’s walk through this together, from picking the right spots to keeping those lenses smear-free, without stepping on toes.
First things first, grab a notepad and walk around your neighborhood or apartment building. Where do people actually feel uneasy? The mailroom, the underground parking, the side gate that never fully latches. That’s your starting point for any neighborhood security camera setup. Don’t just point cameras at your own front door and call it a day. The most effective systems cover shared pathways, entry points, and blind corners. When I mapped out a plan for my own townhouse cluster, I sat down with three neighbors and we literally drew on a printed Google Maps view. That co-design moment meant nobody later said, “Why is that camera staring into my kitchen window?”
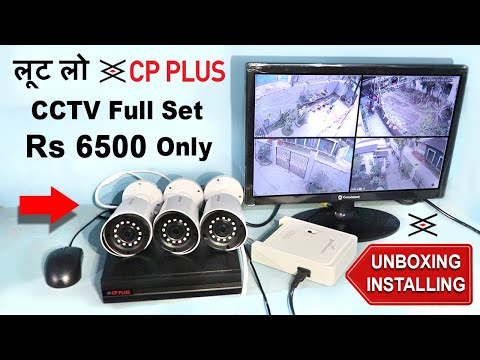
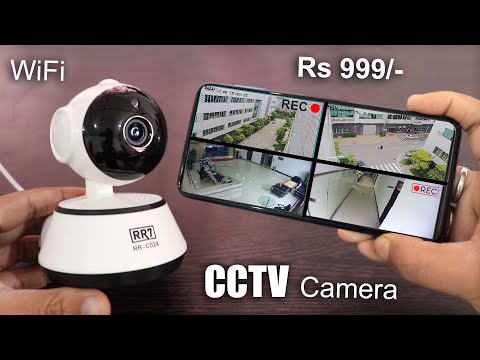
Now, how to install CCTV system components in a way that doesn’t require an electrician’s license? You’d be surprised. Many modern kits are practically plug-and-play. For an affordable community cctv setup, look at wireless systems with a central network video recorder (NVR). You run one Ethernet cable to each camera (Power over Ethernet is magic — one cable does both power and video), then plug the NVR into your router. I’ve set one up in under two hours, and I’m not particularly handy. The key is to mount the cameras high enough that a tall person with a broomstick can’t easily knock them down, but not so high that you need a cherry picker for maintenance. About nine feet up works wonders.
When you’re deep in a community camera system installation, cable routing becomes the unsung hero. Nothing screams “hacker aesthetic” like wires dangling across a brick wall. Use outdoor-rated cable clips, run conduits if you’re in a harsh climate, and for apartment buildings, always check if drilling into exterior walls requires permission. I learned that lesson the hard way with a drill bit, a stucco facade, and a very stern condo board email. Many cctv installation for apartments situations require toolless mounting — there are clamp-on gutter mounts and suction-based pads for indoors that won’t leave a trace. Perfect for renters.
Now, let’s talk about the part nobody discusses at the barbecue: outdoor cctv maintenance. Cameras are not set-and-forget. They’re little robots living outside in the rain, heat, and curious spider webs. I have a recurring calendar reminder every first Sunday of the month: “Camera Spa Day.” That’s when I take a microfiber cloth, a little isopropyl alcohol, and wipe down each lens. Spiders love the IR lights at night, so you’ll often find webs across the glass, causing a blurry bright fog in your footage. A quick wipe fixes that. Also check for corrosion on connectors; a dab of dielectric grease on outdoor RJ45 plugs saves you from intermittent video loss after a heavy downpour.
But what if a camera goes blank or starts flickering before spa day? That’s where community cctv troubleshooting becomes a group activity. My neighbor Leon and I have a pact: if his camera feed stutters, he texts me before factory-resetting anything. Often the issue is a loose connector, a router that pushed a firmware update and reassigned an IP address, or just a power brick that gave up. Reboot the NVR, check the PoE switch lights (if that light is off, the camera isn’t getting juice), and if it’s a wireless camera, move it temporarily closer to the access point to rule out distance issues. Simple stuff. For advanced gremlins, I keep a spare camera body around — swapping it takes five minutes and instantly tells you if the problem is the camera or the wiring.
There will come a time when a camera gets physically damaged: a delivery truck clips a wall mount, or a heatwave fries the internal sensor. In those moments, you’ll need cctv camera repair services or at least a solid replacement plan. I recommend buying from brands that sell individual camera units, not just whole kits. I once had a camera’s night vision LEDs fail, and because it was a known model, I found a local security installer who repaired it for $45 — way cheaper than a new unit. Search for “IP camera repair” in your area; some electronics repair shops specialize in this. If the camera is under warranty, the RMA process is your friend, but document the failure with a photo of the dead feed and the serial number first.
Speaking of documentation, every community cctv installation guide worth its salt should include a sign. Seriously. Put up small, friendly notices: “24-hour video surveillance in common areas for resident safety.” This isn’t just for legal coverage—it’s courtesy. It tells people you’re transparent. In our complex, we added a QR code to a website that shows a live view of the parking lot entrance (with a 10-second delay for privacy). Suddenly, the “suspicious” new system became the community’s tool, not a spying apparatus.
Now, you might be thinking, “This all sounds expensive.” But an affordable community cctv system doesn’t have to be a four-figure investment. Start small: a 4-channel NVR with two 4K cameras for the main gate and lobby. Later, add a third camera for the bike rack. Look at brands like Reolink, Amcrest, or Hikvision’s value lines. A decent starter setup can run under $400 if you self-install. And if you share costs among neighbors — split the NVR expense and each house pays for their own camera if it covers their immediate area — it feels instantly doable. Some communities even set up a small maintenance fund, throwing in $5 a month per unit to cover eventual hard drive upgrades or camera replacements.
One last story: after our camera system was live for three months, a neighbor’s cat went missing. We pulled up the alleyway camera footage and found the furry escape artist squeezing under the fence at 3 a.m. The owner was so relieved, she baked cookies for the whole building. That’s the magic moment when a well-maintained community camera system stops being a security project and becomes part of the neighborhood’s daily life. Keep the lenses clean, the conversations open, and the footage secure, and you’ll have a setup that actually earns its keep.
And if you ever inherit a system that’s a mess of spaghetti cables and forgotten passwords, don’t despair. Start with a single functioning camera, document the model numbers, and reboot everything. Most community cctv troubleshooting victories are just methodical resets and firmware updates. You’ve got this.