









Your Webcam Background Is Boring—Here’s How to Make It Hollywood-Grade Without Going Broke
I’ve been that person fumbling with a wrinkled bedsheet and a desk lamp, wondering why my “professional” setup looked like a hostage video. The truth hit me hard: a green screen background and a decent mobile studio lighting kit aren’t just for fancy studios. They’re the secret sauce that makes you look crisp, intentional, and like you actually know what you’re doing on camera. Whether you’re streaming, filming YouTube videos, or hopping on Zoom calls that matter, getting the right gear—and knowing how to use it—changes everything. The good news? You can rent what you need for a one-off project or buy an affordable kit that grows with you. Let’s break it down like we’re grabbing coffee and I’m showing you my own trial-and-error journey.
A few years ago I had a client pitch over video, and I thought, “I’ll just hang a green piece of fabric behind me and use some room lights.” Big mistake. The green was all wrinkled, my face was half in shadow, and the software kept making my hair disappear into a weird digital void. I lost the gig. That’s when I finally dug into what actually works—and discovered that renting a proper green screen background and lighting setup would have saved me for about the cost of a pizza. Since then, I’ve tested both renting and buying, and I’ve got strong opinions.
Let’s start with the elephant in the room: green screen background rental. It’s a lifesaver if you’re doing a short-term project, a single live stream event, or just want to test the waters before committing. Many local camera shops and online rental houses offer collapsible or pull-down green screens in various sizes. You can even rent a full kit with stands. The quality difference between a rental-grade backdrop and a cheap Amazon sheet is night and day—rental ones are usually wrinkle-resistant, thick, and perfectly chroma-key green. If you’re in a city, you can often pick up a green screen backdrop for streaming or filming for a weekend at a fraction of the purchase price. It’s a no-brainer when you only need it once.
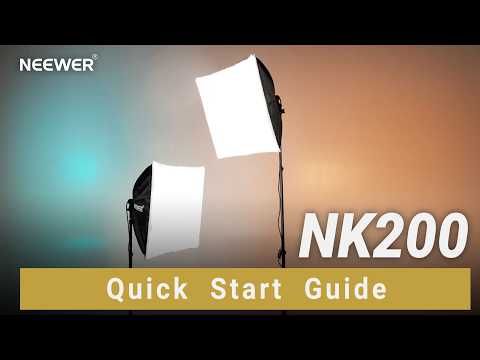
But here’s the thing: renting is only half the equation. You can have the best green screen in the world, but if your lighting is bad, the key will be a muddy mess. That’s where a mobile studio lighting kit comes in. I learned this the hard way: even a cheap green screen looks decent when lit evenly, while an expensive one looks terrible with shadows. A good portable lighting kit typically includes two or three LED panels, stands, and sometimes softboxes. You can rent these too—many places bundle a video lighting equipment rental with the backdrop. When I started, I rented a full setup for a week: two softbox lights, a ring light, and a 5x7 foot green screen. Total cost was under $50, and I looked like I had a production team. For anyone wondering how to use green screen effectively, consistent, diffused lighting is the non-negotiable first step.
Now, if you’re like me and found yourself suddenly needing a setup multiple times a month, it might make sense to buy green screen kit instead of renting. A full affordable green screen kit can cost less than what you’d spend on three or four rental weekends, and you’ll always have it ready. I eventually snagged a kit with a collapsible frame, a wrinkle-resistant muslin backdrop, and a carry bag for about $60. Not the fanciest, but paired with the right lights, it outshines most built-in virtual backgrounds. Look for one that’s large enough to cover your sitting/standing area—5x7 feet is the sweet spot for a single person. Some pop-up styles set up in seconds and fold down into a disc, perfect for small spaces. If you’re into streaming, a green screen backdrop for streaming that’s easy to mount behind your chair is a game changer. You don’t need a permanent studio; you can tuck it behind your desk.
Of course, the backdrop is only the canvas. Let’s talk about studio lighting setup. Many beginners make the mistake of lighting only themselves and ignoring the green screen. You actually need two separate lighting considerations: your own face and the backdrop. The goal with the green screen is even, shadow-free light. I placed two softbox lights at 45-degree angles to the screen, at equal distance, and dialed them to the same brightness. Then I used a third light (a small LED panel) as a hair light from behind to separate me from the background. My face got a key light and a fill light. This might sound like a lot, but you can achieve it with a portable lighting for video kit that packs down into a shoulder bag. Many kits now come with all the lights I just mentioned, plus color temperature adjustment. If you’re working in a cramped room, a foldable ring light plus a couple of clip-on desk lights with diffusion can work wonders.
One of my favorite green screen lighting tips: always check your camera’s preview before going live. Look at the green screen—do you see any hot spots or shadows? Adjust until it’s a flat, uniform color. Even a slight gradient can cause keying artifacts. Another tip: wear clothing that contrasts with the green. Avoid green shirts, obviously, but also watch out for reflective jewelry or glasses that might pick up green spill. A little distance between you and the screen (at least 3 feet) helps minimize spill and shadows.
If you’re on the fence between renting and buying, consider a hybrid approach. Rent a high-quality mobile studio lighting kit for your first important shoot to learn what you like, then buy an affordable green screen kit that you can use for regular calls. You don’t need to drop serious cash upfront. My current go-to for quick setups is a $40 collapsible green screen and a $100 LED panel set that doubles as a video light and a backdrop light when I flip it around. I’ve used it for client calls, live tutorials, and even a virtual wedding toast where I keyed in a tropical beach. Nobody knew I was in a 10x10 office.
The bottom line: you can look like you have a full production studio with a little knowledge and the right tools. Whether you opt for a green screen background rental for a one-off gig, or you buy a green screen kit and build a portable lighting for video setup that goes wherever you do, the key is intentionality. Light the screen first, then light yourself, and check before hitting record. It’s honestly simpler than most people think, and once you nail it, you’ll wonder why you ever settled for that cluttered bookshelf in the background. Now go make some magic—I believe in your next-level video presence.