






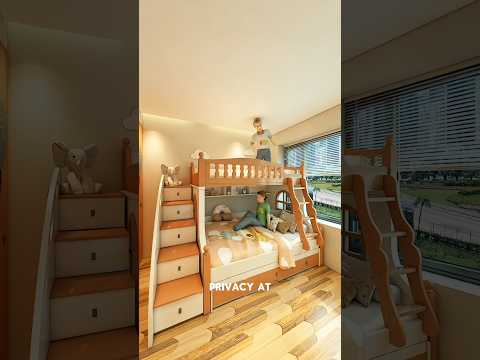




From Blank Screen to Photoreal Dream: My Friend’s Guide to Architectural 3D Modeling & Rendering
I remember the first time I opened a 3D program, stared at a gray grid, and thought, “How on earth do people turn this into a sun-drenched living room that looks like a photograph?” Fast forward a few years, and I’m the friend everyone calls when they need to make a client say “wow” before a single brick is laid. If you’re starting out or stuck in the muddy middle, I want to walk you through the exact messy, joyful path that took me from clumsy cubes to renders that even my mom thought were real photos.
When I first started out, I didn’t have a mentor. I just downloaded every piece of 3d interior design software I could find, opening them like a kid with a new toy box. SketchUp felt like the friendly neighbor who speaks plain language — perfect for quick massing and those satisfying 3d floor plan renderings that make a two-dimensional layout suddenly feel like a home you could walk through. I’d trace an old apartment floor plan, push/pull the walls up, drop in some basic furniture, and hit render with a free plugin. It was rough, but I could already see the power: a 3d floor plan rendering can sell a concept faster than any mood board.
But I wanted more. I wanted the soft light spilling across a wooden floor, the subtle fuzz on a throw pillow, the reflection of a window in a polished concrete countertop. That’s when I realized that knowing how to render architectural models isn’t just about hitting a button — it’s about understanding light like a photographer and materials like a set designer. I started devouring every architectural visualization tutorial I could find on YouTube, following along at midnight, rewinding ten times to see exactly how a guy tweaked his sun’s angle and intensity.
A big turning point was deciding to learn 3ds Max for architecture. I won’t lie: 3ds Max felt like walking into a spaceship cockpit after SketchUp’s bicycle. The interface is dense, the modifier stack is a beast, but the control it gives you over every vertex, every mapping coordinate, is unmatched. I spent weeks just modeling a mid-century chair, getting the seams right, the button tufting, the way the leather stretches. That deep dive into 3d modeling for beginners interior taught me more than any quick project could — it drilled into me the importance of clean topology, grouping, and naming conventions. You don’t realize how crucial those are until you’re trying to change a light fixture at 2 a.m. and can’t find it in a sea of “Box001” objects.
Once the modeling muscles were there, the next obsession became rendering. I had heard endless debates about the best rendering software for architecture — V-Ray, Corona, Lumion, Enscape, you name it. I tried them all like tasting different coffees. Lumion gave me instant gratification, that atmospheric haze and fast-moving clouds right out of the box. But if I wanted true photorealism, I kept coming back to the sketchup to vray rendering pipeline because it felt like developing film in a darkroom. There’s a rhythm to it: you set up your camera like a real photographer, adjust your exposure, add a subtle vignette, and then you wait, sometimes hours, for a single image to resolve into something breathtaking.
Here’s the thing: a photorealistic rendering tutorial will teach you about global illumination, about sampling and denoising, but it won’t tell you the tiny secrets that make a render sing. Like adding a smudge of fingerprint on that stainless steel fridge, pulling a chair slightly out from the table so it feels lived-in, or putting a book open face-down on the armrest as if someone just got up to answer the door. These interior 3d rendering tips aren’t technical — they’re human. And once I started treating my scenes as sets with a story, my clients stopped saying “that looks nice” and started saying “I want to be in that room.”
One project that changed everything was a tiny downtown coffee shop. I modeled it from scratch, used the sketchup to vray rendering workflow to place dozens of IES light profiles, and spent an embarrassing amount of time finding the perfect baked-goods texture for the pastry display. When the owner saw the final image, she teared up because I had captured the exact warm, honey-like afternoon light that streamed through the front window at 3 p.m. All from a computer. That’s the magic of knowing how to render architectural models with intention.
If you’re currently wading through the massive sea of tutorials, let me save you some time. Start with a reliable 3d interior design software that matches your patience level — something intuitive like SketchUp or even Blender if you’re budget-conscious and brave. Build a complete room: model a window, a floor lamp, a rug. Don’t just slap materials on; learn to unwrap UVs properly, even if it’s tedious. When you’re ready, look into an architectural visualization tutorial that takes you from initial block-out to final post-production in Photoshop. There are gems out there that treat the whole process holistically, not just the software bit.
Don’t skip the boring stuff. The reason many people struggle when they later try to learn 3ds max for architecture is that they never really got comfortable with precision modeling. Snapping to a point, entering exact dimensions, building a 3d floor plan rendering from a CAD file — these foundational skills are like practicing scales on a piano. They’re not glamorous, but they make everything else effortless.
Eventually, you’ll find yourself in a flow. You’ll have your go-to best rendering software for architecture (mine became V-Ray, but a close friend swears by Corona’s simplicity), you’ll have a library of carefully tuned materials, and you’ll develop an eye for what makes a scene feel real. On a Tuesday night, you’ll nudge a floor lamp half an inch to the left, add a slight bloom in the frame, and just sit back and smile because you made something beautiful.
There’s no single photorealistic rendering tutorial that will unlock everything. It’s a patchwork of watching others, failing in private, and discovering your own little tricks. I keep a notebook of interior 3d rendering tips I’ve stumbled upon — things like using a subtle Z-depth pass to fake camera blur, or layering a faint noise texture over glass to break up perfect reflections. Those are now part of my secret sauce.
So if you’re staring at that blank screen tonight, trust that the path from beginner to “how did you do that?” is shorter than you think. Open your 3d modeling for beginners interior project, light it like you mean it, and let the pixels tell a story.